How do you feel about the yellow one? Yay or nay?
MAC Style Warriors Lipglasses

A beauty blog blooming with fresh makeup reviews, swatches and beauty tips from your friendly neighborhood beauty addict
How do you feel about the yellow one? Yay or nay?

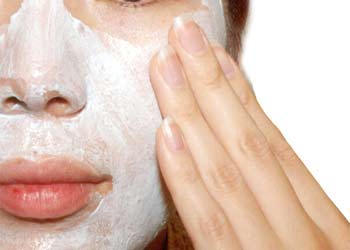
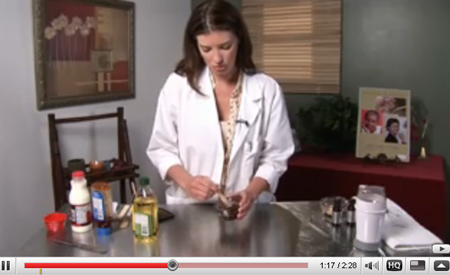
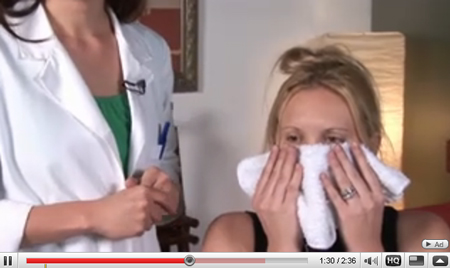
Like our stomachs, our skin doesn’t always work the same way every day. Sometimes it gets a little fussy and doesn’t want to behave.
Skin care is one of those things I didn’t really take seriously until my late twenties. I WISH I’d started paying more attention to it sooner, but c’est la vie!
To help with a wide variety of skin situations (I’ve faced my share of them), here’s a list of 21 skin care tips.
If you enjoyed this post, you may also like…

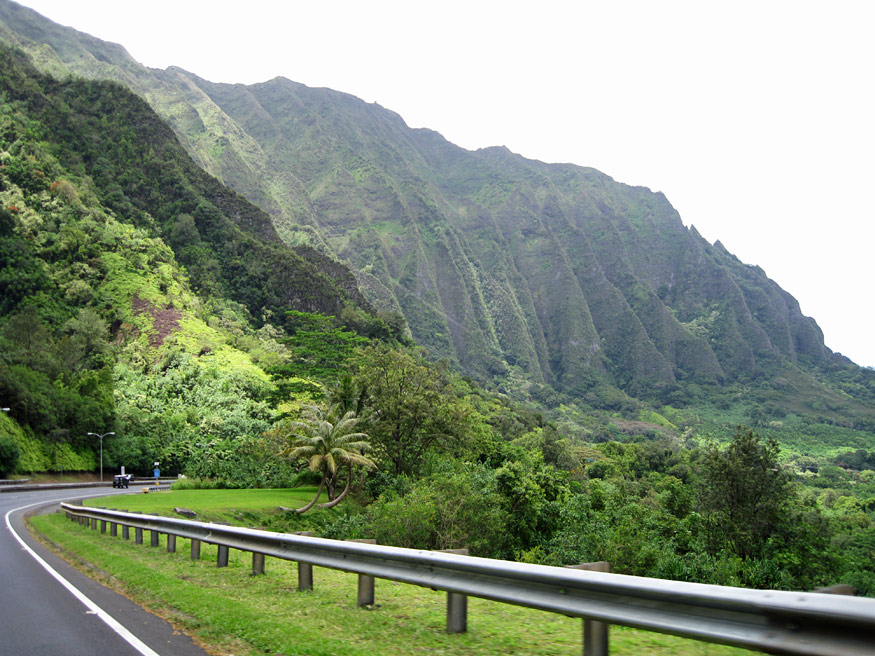
I know we’re getting close to my in-law’s house when I can see the Ko’olau Mountains.


The view of the SF Bay Area. The fog on the right is covering up the Pacific Ocean.
Today EV of Almost Daily Inspiration shares a wild runway look inspired by Francois Nars.
Hi, folks! I thought I’d try something a little different for you all and offer up a tutorial for my version of a wild runway look created by Francois Nars. It’s not exactly what you’d call “work appropriate,” but as Nars himself said, “You want to play with makeup.” So let’s have some fun, shall we?
First, a little background. Allow me to take you back to February’s Fall 2009 New York Fashion Week. Sure, most of the clothes were boring (thanks, recession-inspired conservatism!), but the makeup was consistently incredible: gray lips, fierce smoky eyes, and splashes of neon all made an appearance. And the absolute biggest, juiciest beauty story of the week was Francois Nars’ return to the runway after 10 years. He was lured back by none other than the wildly creative Marc Jacobs (he of the blue hair and the man skirts and the in-your-face attitude) and his collection of ’80s club-kid clothes. Nars was so inspired, in fact, that he took on the challenge of designing individual looks for all 60 models in the show. Wow.
Each look started with a bold black eye shape, which was then paired with a splash of whatever color he felt would best bring out the model’s features. Check it out:

style.com, photo by Greg Kessler
Such simple shapes and colors yet with a major impact. While purusing the show’s gallery on style.com (which I highly recommend doing, by the way), I found myself totally fixated on this red, orange, and black exaggerated cat eye.

style.com, photo by Greg Kessler
Of course I had to try it on, so this is the basic look we’ll be working from for the tutorial.
I apply a thin layer of Urban Decay Primer Potion with my fingers, and let it dry. Now, the secret to doing crazy exaggerrated looks like this one is giving yourself a map to follow.
Break down the individual components of the look, and pay attention to where the lines begin, end, and curve. I like to cheat a little and play connect the dots: I use my Urban Decay 24/7 Liner in Zero to place small marks at the outside points of the wing I want to create. This way, I can make sure I’m happy with the placement before I go and smear ten pounds of black paint on my face. Here is the basic layout of my wing:

I want this black to be intense, so I’m going to apply a base layer of color by using Zero to shade in the whole shape. You could also use Blackground Paint Pot or even a shadestick for this step, but I prefer the Urban Decay pencils as bases because they’re easy to control and blend for precise work like this. With my weapon of choice, I carefully connect the dots to outline the shape of the wing, and then use the side of the pencil to shade in one patch at a time. I use my Posh smudger brush to blend the shaded patches together. It now looks like this:

You don’t need to be concerned about uneven color saturation or perfect lines at this point; we’ll go over it again later. Think of this as your rough draft wing.
First, I use my finger to apply MAC Paint Pot in Painterly from my crease, up to my browbone, and out to my temple to even out any discoloration and provide a sticky base for the shadows. With the 239 shader brush, I apply MAC Firespot eye shadow starting at my crease (where the black wing ends) and extending a little above my eyebrow and out to my temple, following the curves of the wing. You want to build the color slowly, and blend out your edges so the color fades in to your skin.

Aromaleigh’s Helterskelter is really an amazing color, and I highly recommend picking it up! The technique for using loose mineral shadows is the same as for pigments: use a dense, firm brush (like the 239 or 252), and “pack” or “dab” the shadow on to your eye rather than swiping it. Work slowly and gently, and you won’t have any fallout to clean up.
Using my 239 brush, I pat Helterskelter on top of Firespot, concentrating on the inner and outer corners of the shape I’ve created with the orange. Then, I pat a tiny bit of Fyrinnae Fool’s Gold on top of Firespot in the center of each browbone, just to brighten up the look a bit. I blend the three colors and all the outer edges with the 224 blender brush. Use a very light hand here because you don’t want to make the color disappear!

I add a drop of Duwop Payoff to my Urban Decay Zero eye shadow pan, and let the liquid sink in. (Payoff is a great product for getting the wet application look but with much better staying power!) Using my 219 pencil brush and working slowly, I shade in the black wing and clean up my edges. I wanted to leave it a bit smokey, but you could go over the outer edges with a black gel or pencil liner if you prefer a sharper look.
…with my 266 angled brush and the Urban Decay Zero shadow. You want to exaggerate your brow shape a little bit, but without making it look too fake. The trick is to focus on drawing a sharp line at the bottom of your brows from the inner to the outer corner, then flick and blend the color up through your brows with your brush.
Last step is some Dior Iconic Mascara, and we’re done with the eyes! This photo is taken with flash to better show off the colors.

The rest of the face is pretty basic. I do a verrrry light sweep of Helterskelter across my cheekbones with the 187 and blend well. For the lips, I’ve mixed two red MAC lipsticks to get a glossy, deep red pout. Using the Sephora lip brush, I first apply Dubonnet, then gently dab Ladybug on top. When wearing lipstick, I like to sharpen up my lip line by applying a quick swipe of CARGO’s The Reverse lip liner all around the edges, and then blending it in. It isn’t necessary, but it helps my red lips “pop.”
Here’s the finished look! This is my best disaffected model vacant stare:

Okay, Miss Tyra would totally yell at me for losing my neck, but you have to admit that’s a pretty fierce cat eye!
Sure, this is in no way an everday look, but I still encourage all of you to break out the most colorful shadows in your makeup kits and try it out! It doesn’t really matter if you just wear it around the living room and practice your runway strut for your cats; just think about how badass you’ll feel with a fearless splash of color on your lids.
On that note, I’d like to leave you with one of my favorite warm and fuzzy quotes about beauty, which just happens to be from Francois Nars: “Follow your instinct. Wear whatever makes you happy. Mix and blend and mix some more.” That may as well be my makeup mantra. You don’t need to be a master of blending or own 387 colors of eye shadow; you just need instinct and attitude and colors that make you happy!
This post was written by EV, who blogs about makeup and makeup artistry at Almost Daily Inspiration. When she isn’t finding killer deals on the interwebz, she’s working as a research assistant at a breast cancer clinic, drooling over Urban Decay and MAC, or playing with her two kitty kids.
The giveaway is now closed, and I’m contacting the winner by e-mail. Good luck!

Heya, girls. It’s just before 4:30AM here in jungly Kaneohe, but my body hasn’t adjusted to the time difference yet. I’m wide awake (the neighborhood chickens aren’t even up!).
As usual for mornings here, it’s raining, but the sound of it is keeping me company as I type this post in the dark.
I hope you slept well because it’s time for today’s Tarte giveaway and the MBB virtual Saturday potluck!
Bring your flip-flops, the macaroni salad and your swim trunks because weekends in Hawaii are all about picnicking and hanging out with friends and family at the beach.
And just because we’re not all in the same ‘hood this afternoon doesn’t mean we can’t all make it to the party.

One lucky lady will win Tarte’s The Vanity palette (a $52 value).
Bring your imagination because this mega-palette comes stacked with three levels of lip, cheek and eye makeup.
The Vanity is limited edition (read: hard to find), released during holiday 2008, but if you missed her then, here’s a chance to try again.
To enter the giveaway and attend this afternoon’s virtual potluck, just leave a comment on this post with what you’re going to bring to the party. There will be a lot of us, so we’ll need tons of snacks (what Hawaiians call pupus) and food, beach games and beverages.
I’m going to bring my macaroni salad, fruit punch and barbeque chicken, yum!
I’ll choose one winner at random from among the people who enter by 11:59 PST Saturday night.
Good luck!
Your friendly neighborhood beauty addict,
Karen
The giveaway is now closed, and I’m contacting the winner by e-mail. Good luck!

Good morrow, my Liz Lemons. I have a confession. Prominently displayed all around my parents’ house are pictures from my high school years, and my makeup looks GAWD AWFUL. The worst one pic is on the fridge, a snapshot of me sitting next to my mom at my 16th birthday party.
That night I decided to wear a translucent face powder, and in every flash picture my skin was an unearthly shade of gray.
Tragic!
Since then, I’ve learned a thing or two about makeup and flash photography…
And I bet you’ve got some tricks up your sleeve, too. 🙂
Are you ready to put on your makeup thinking caps to help out a fellow beauty junkie in need?
MBB reader Lesley wrote in yesterday asking for help with photography makeup tips for a few upcoming events.
I’m graduating next week (on the 22nd to be exact), and I’ll be having my graduation AND engagement pictures taken soon in an indoor studio.
It’s been great that you have been putting up a lot of tutorials and how-tos lately, so I’ve been getting ideas, but I was wondering if you have any recommendations or tips for makeup options and/or absolute dont’s for portrait makeup?
Any help would be greatly appreciated as I’ve only really gotten into makeup this past year.
What’s up, Lesley? Congrats on graduation and getting engaged. Talk about two mega milestones — WOOT!

Last November my BFF Jen asked me to be one of her bridesmaids, and I did my own makeup.
Here are a couple handy tips regarding makeup and photography:
For even more makeup tips, check out the interview I did with my friend Jen’s wedding makeup artist, Lynette. The tips are labeled as Wedding Makeup Tips but apply to all occasions where photography is up in the mix. Also, check out How to Look Your Best in Pictures, which gives advice on how to pose for pictures. 🙂
Ladies, I know you’ve got some good advice for our girl Lesley. When it comes to doing your own makeup for pictures, what are your favorite tips?
Your friendly neighborhood beauty addict,
Karen
Today Rowena from Cosmetic Candy Blog shares five of her favorite face primers.🙂

From the first moment I discovered primers, I have been obsessed with all the various kinds of textures and types out there.
Primer is supposed to do a few things; firstly prepare the face as a canvas, smoothing out pores and wrinkles, making foundation easier to apply and last longer. Some primers are color corrective, so useful for people with dull skintones or overly red ones, some primers have mattifying properties for oily skins, and some contain salicylic acid for acne prone gals.
There are also various textures to choose from — gels, creams, lotions, silicone based.
I have completely troublesome skin; oily on my t-zone, dry on the cheeks that then turns oily, sometimes flaky, always rosy, medium pores and a splattering of acne. I like my primers, but some work for me, some don’t.
With that in mind, here are five of my favourite primers.

Le Blanc De Chanel Primer (30ml, $45) is a scary looking white creamy liquid that applies looking a tad wan, then rapidly sinks in to leave a brightening, radiant effect. I am not a fan of anything that looks chalky on my skin, and this primer does not leave my NC35 skin looking ghostly.
As well as illuminating, this silicone based primer is supposed to smooth out the skin surface and makes make up last longer. It is quite a rich, moisturizing primer — the SA told me when I bought it that it was for more mature skins than mine (but I bought it anyway!). Oily skins may struggle a little with it as it can be a little rich, especially if you apply too much product. Alternatively, it can be applied to specific areas of the face just for a highlight.
I like this used with a mattifying foundation like Chanel Mat Lumiere as it gives a refined glow.
Verdict: A wonderful illuminator

Sitting in a beautiful glass jar is Paul & Joe’s moisturizing foundation primer, (30ml, SPF 12 apart from shade 03) which is a creamy liquid that comes in three shades.
I have shade 2 which is the warmest tone. Although I don’t like scented face products, this one smells beautiful and it really adds moisture to the face and adds a soft, dewy glow. Used sparingly under a powder foundation, it helps balance my skin so that I don’t get that horribly cakey-powdery-nose look. It also smoothes out my pores but not in a fake, over the top way and looks oh so pretty on my dressing table.
Verdict: Keeps the skin hydrated all day

Illamasqua is a fairly new UK based make up brand, one which will be winging its way all around the world quite soon! Their Satin Primer (30ml, SPF 20, £18) is a white lotion which sinks in quickly and adds instant glow. Even with foundation and primer on top, my face is left with a beachy glowy look without looking like I have dunked my head into some Crisco. SPF 20 is also a big bonus!
Verdict: Dewy Goodness

RMK make wonderful base make up products, from concealers to foundations to powders. Their primers are also excellent and come in liquid (30ml) for normal to oily skins, Creamy Matte Base (colorless and mattifying) and Creamy Make Up Base (30g) in two hues. I have a liquid and a creamy and I alternate depending on if my skin is feeling oiler or drier on the day.
Creamy make up base is my favourite because it really smoothes out the face and can be used all over. It adds a subtle glow and covers pores and lines quit well. I’ve also find it makes make up last longer, but works best if you give it some time to sink in properly.
Verdict: A great all rounder

This primer sits in a little pot (15ml, $30), inside containing a light salmon colored thick cream which easily blends into the skin. This primer is not just your average primer — it fills in lines and pores too using what Clarins calls miniscule Acacia Micro Pearls that sink into wrinkles and plump out the skin. I had to think long and hard before buying this one because it’s expensive for not a lot of product, but I am glad I did.
I use this just on targeted areas like on my cheeks where pores are more prominent and around my mouth where I feel lines may be visible. It provides me with the smooth canvas to work with and I really notice the difference to using foundation on its own and using it with this. If I want an extra boost, I use another primer all over and this one just on spots that needs some extra oomph!
Verdict: Polyfilla for the face
If you already have amazing skin, a lot of primers can be used on their own just to add some glow. Have I converted you to priming your face if you don’t do so already?! You know what they say; a stitch in time saves nine (or rather, a layer of primer saves you the job of retouching later!).
This post was written by Rowena, the creator and writer of Cosmetic Candy Blog, where she writes about everything beauty related, moans about bad customer service and talks about her 5 fat kittehs.